> For the complete documentation index, see [llms.txt](https://helpcenter.etron.info/llms.txt). Markdown versions of documentation pages are available by appending `.md` to page URLs; this page is available as [Markdown](https://helpcenter.etron.info/verwaltungsoberflache/konfiguration/e-commerce/zahlung/zahlungsanbieter/etron-pay-rs2.md).
# ETRON Pay (RS2)
> *Konfiguration -> E-Commerce -> Zahlungsanbieter -> ETRON Pay*
ETRON Pay bietet eine umfangreiche Unterstützung von Zahlungsanbietern wie Mastercard, Visa, Paypal, Klarna, giropay, usw. an.
{% hint style="info" %}
*Die über einen Zahlungsanbieter durchgeführten Zahlungen sind unter*[ *E-Commerce -> Onlineshop - Zahlungstransaktionen*](/verwaltungsoberflache/e-commerce/onlineshop/zahlungstransaktionen.md) *protokolliert.*
{% endhint %}
### Einrichtung von ETRON Pay
{% stepper %}
{% step %}
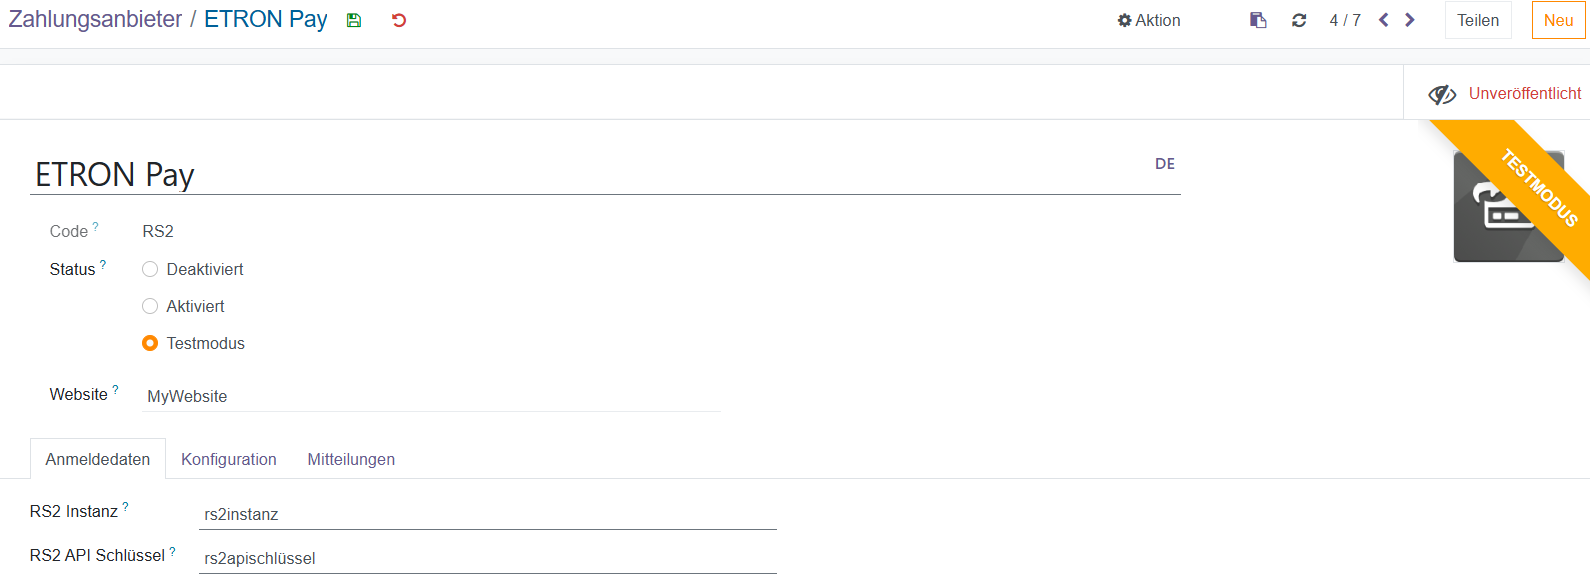
### Anmeldedaten: RS2 Instanz und RS2 API Schlüssel
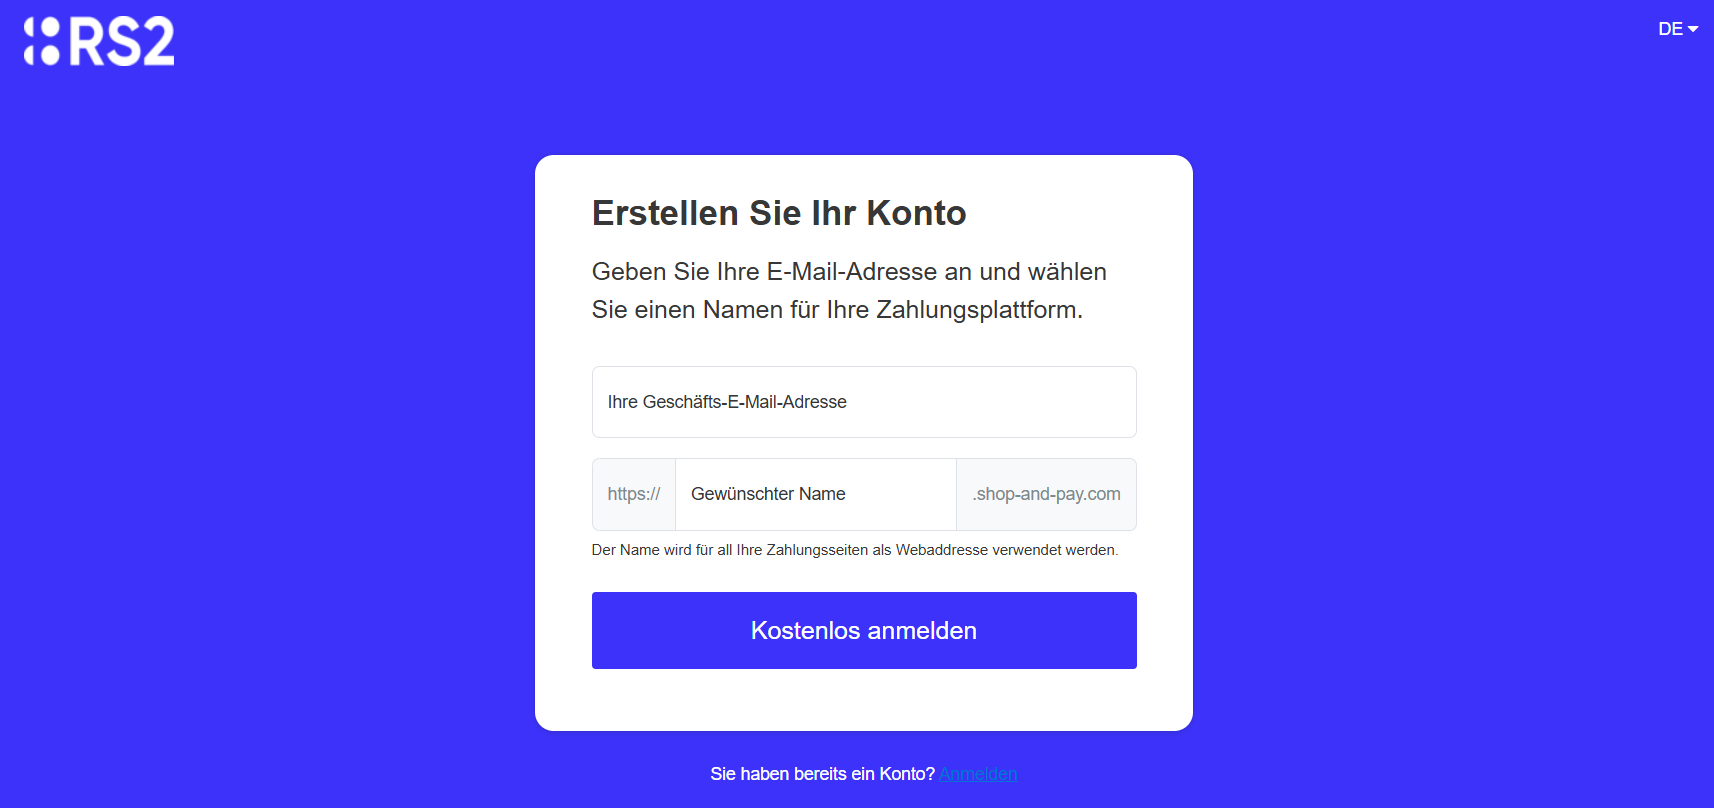
Für die Eingabe der Zugangsdaten im Reiter "Anmeldedaten" die Seite von RS2 aufrufen und ein Konto erstellen.
Der Name, der als **"Gewünschter Name"** eingegeben wurde, wird beim Zahlungsanbieter ETRON Pay **im Feld RS2 Instanz eingetragen**.
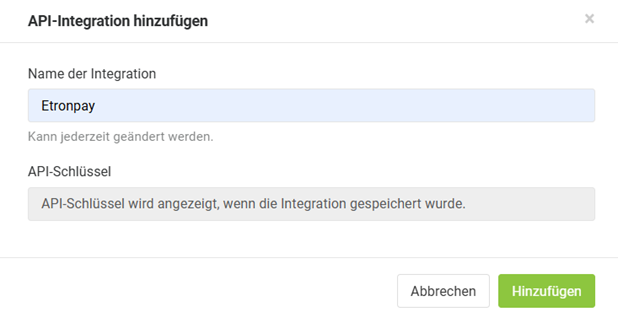
Um den **RS2 API Schlüssel** zu **erhalten, im RS2-Konto** das Menü "**API und Integrationen**" öffnen, und den Button "**API-Schlüssel hinzufügen**" auswählen.
Eine Bezeichnung für die API-Integration eingeben und hinzufügen.
Den **erstellten API-Schlüssel kopieren** und in der ETRON onRetail Instanz beim Zahlungsanbieter ETRON Pay im Feld RS2 API Schlüssel einfügen.
{% endstep %}
{% step %}
### ETRON Pay aktivieren und in Onlineshop und am Kassen-Zahlterminal verwenden
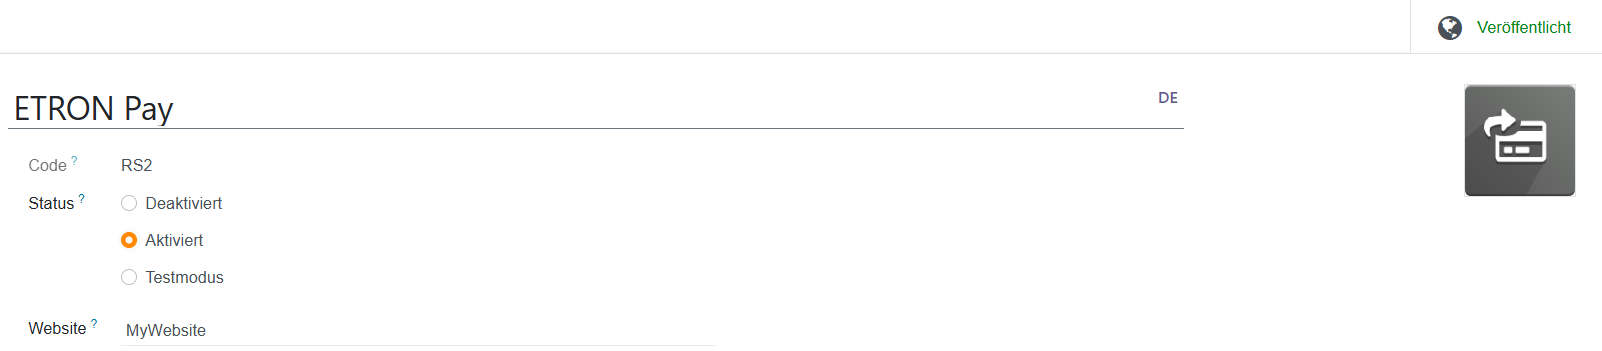
Um ETRON Pay als Zahlungsanbieter zu aktivieren, den **Status** auf **Aktiviert** setzen. Dadurch wird der Zahlungsanbieter auch **Veröffentlicht**, und ist **im Onlineshop als Zahlungsmethode verfügbar**.
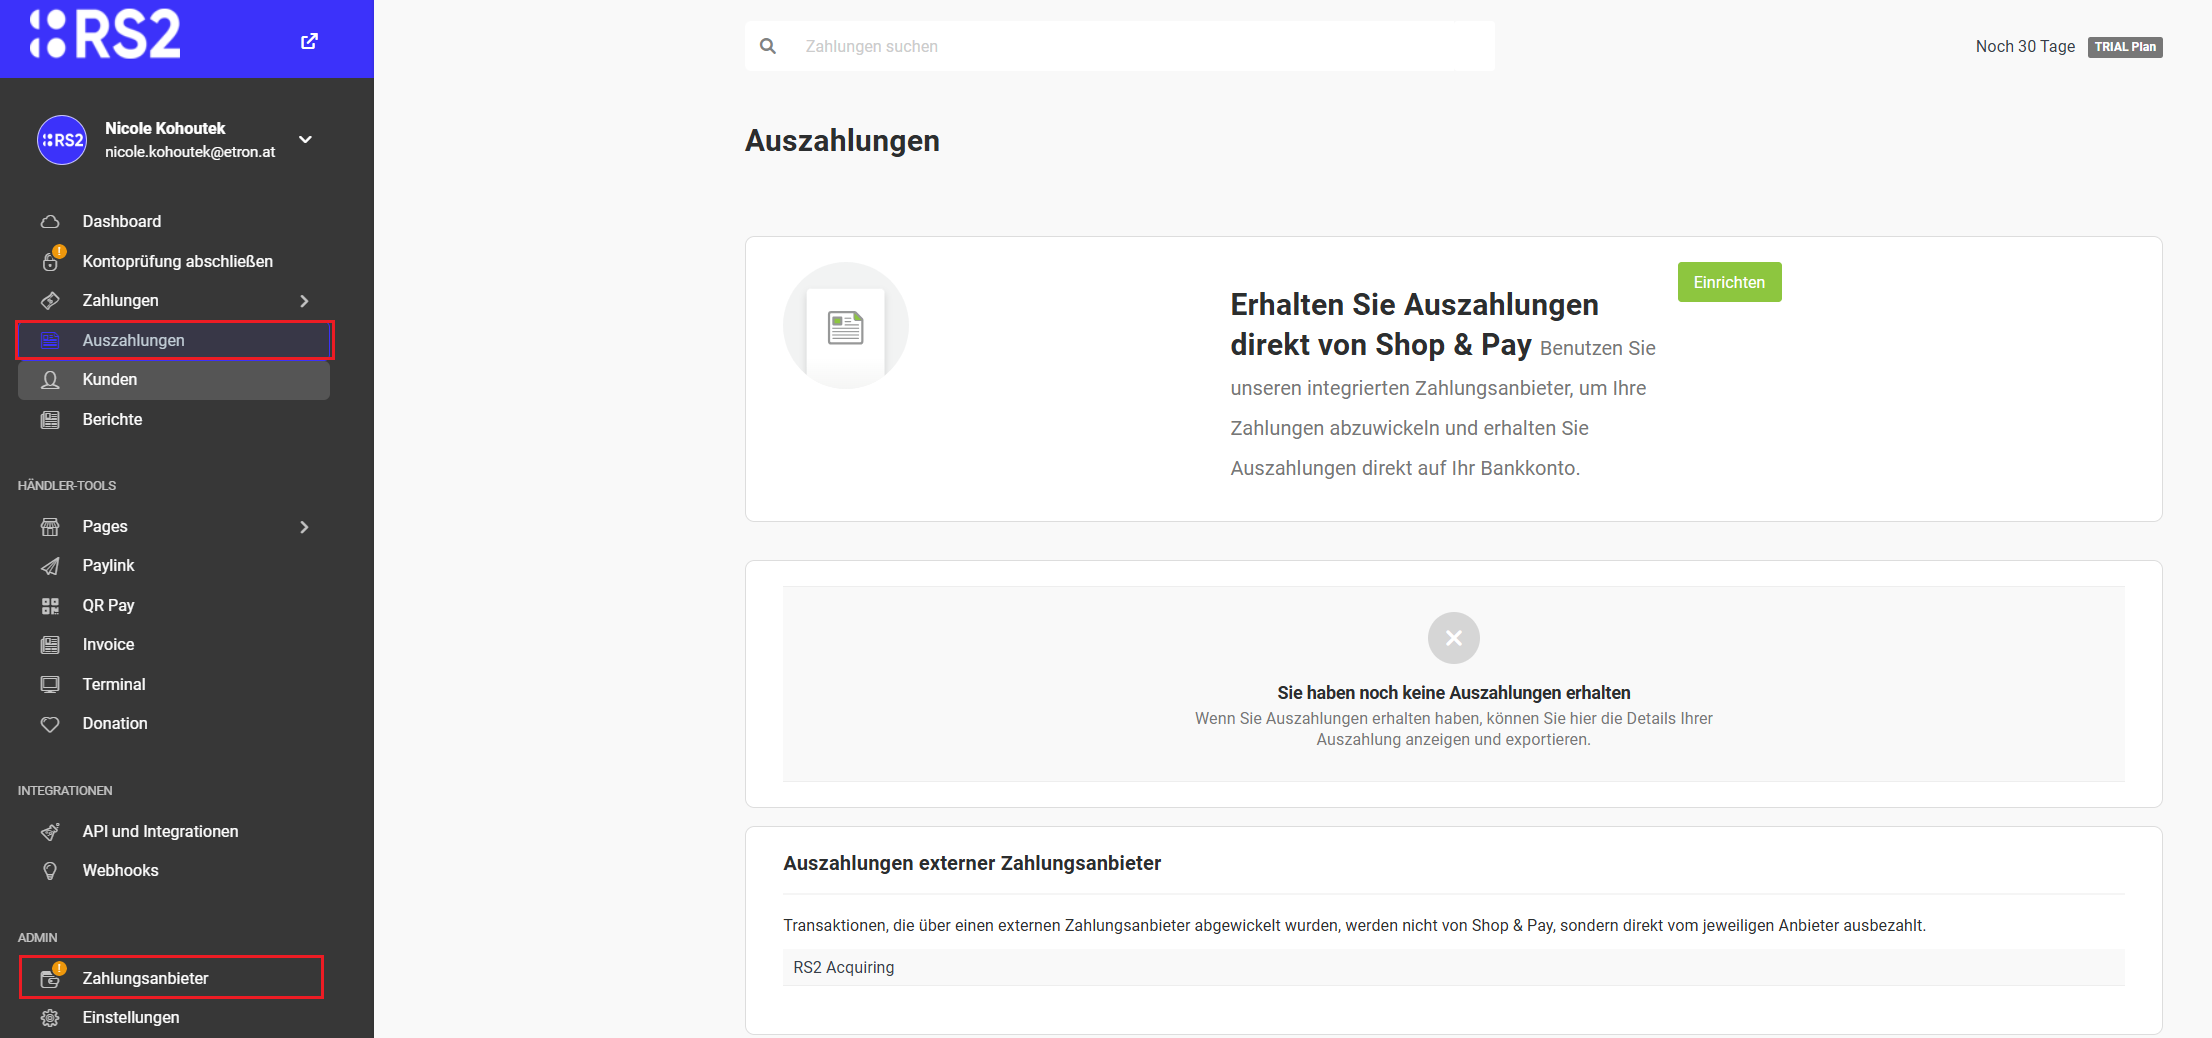
Die Auszahlung und die Aktivierung von Zahlungsanbietern wie z.B. Paypal werden im RS2-Konto im Menü Auszahlungen bzw. Zahlungsanbieter konfiguriert.
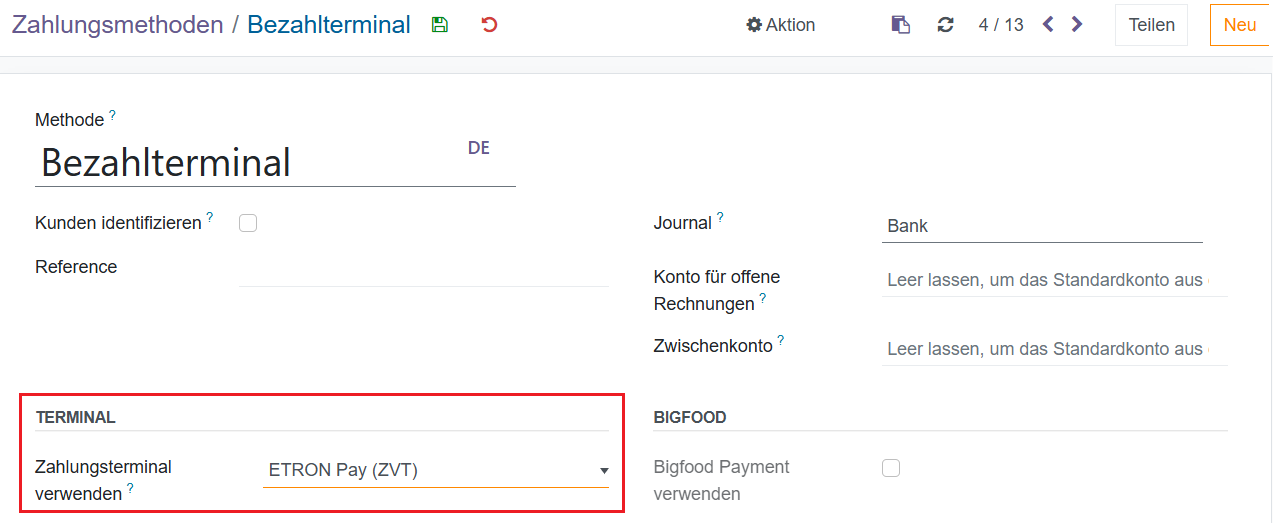
Für die Verwendung von ETRON Pay in der Kasse wird unter [Konfiguration -> Kassen -> Zahlungsmethoden](/verwaltungsoberflache/konfiguration/kassen/zahlungsmethoden.md) eine **Zahlungsmethode (Bezahlterminal)** angelegt, und unter **Zahlungsterminal verwenden** das Terminal **ETRON Pay (ZVT)** ausgewählt.
{% endstep %}
{% endstepper %}
---
# Agent Instructions
This documentation is published with GitBook. GitBook is the documentation platform designed so that both humans and AI agents can read, navigate, and reason over technical content effectively. Learn more at gitbook.com.
## Querying This Documentation
If you need additional information that is not directly available in this page, you can query the documentation dynamically by asking a question.
Perform an HTTP GET request on the current page URL with the `ask` query parameter, and the optional `goal` query parameter:
```
GET https://helpcenter.etron.info/verwaltungsoberflache/konfiguration/e-commerce/zahlung/zahlungsanbieter/etron-pay-rs2.md?ask=&goal=
```
`ask` is the immediate question: it should be specific, self-contained, and written in natural language.
`goal` is optional and describes the broader end goal you are ultimately trying to accomplish on behalf of the user. GitBook uses it to tailor the answer towards what is most useful for that goal.
The response will contain a direct answer to the question and relevant excerpts and sources from the documentation.
Use this mechanism when the answer is not explicitly present in the current page, you need clarification or additional context, or you want to retrieve related documentation sections.